Description
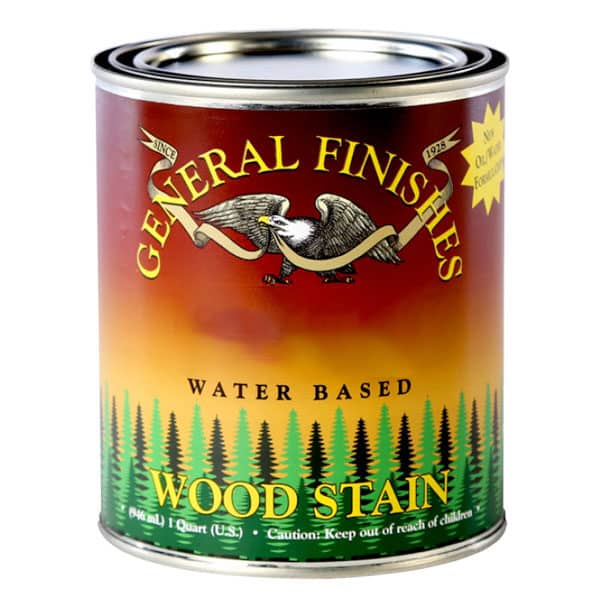
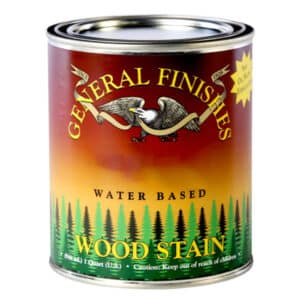
General Finishes Wood Stain 946ml have superior qualities over oil-based stains. Their high-quality pigments produce rich, dark, uniform colors on hard-to-stain woods like maple and pine. Low odor, low VOC, water cleanup, and noncombustible. Looking for a “green” environment-friendly finish? These stains are now formulated with more than 50% RENEWABLE RESOURCES formulated from sustainable materials that decrease the carbon footprint.
Before applying General Finishes Wood Stain 946ml. all raw wood projects require preparation sanding, and all existing finishes require prep cleaning and sanding. If you skip this critical step, your finish may fail.
Preparation for Raw Wood Projects
See our video: How to Prep Sand Raw Wood
- Sand open-grain wood (e.g., oak, ash, mahogany, parawood) with 120-grit sandpaper, followed by 150-grit, then 180-grit.
- Sand closed-grain wood (e.g., cherry, pine, maple, birch, alder) with 150-grit sandpaper followed by 220-grit.
- Remove dust with a vacuum, compressed air, an oil-free tack cloth or a water-dampened rag.
- Do not over-sand with fine-grit sandpapers; this will close and seal the wood grain, preventing ideal color absorption.
- Do NOT use steel wool with water-based finishes; the particles will get trapped in the finish and rust.
Reducing Grain Raise on Raw Wood
To reduce grain raise, dampen the wood with water after prep sanding. Let dry completely, then lightly sand with fine-grade (220-320) foam sanding pad.
Preparation for Projects with an Existing Finish
For high-use areas with heavy grime build-up and oil from hands, give your project a deeper cleaning. See our video: How to Prepare Existing Finishes
- Scuff clean with a Scotch-Brite™ pad or maroon synthetic steel wool and a 50:50 mix of denatured alcohol and water.
Avoid cleaning with products containing phosphates (salt), which can linger in the substrate and produce a white haze. If your project requires a deeper cleaning, see Power Prep Cleaning Highly Used Existing Finishes below.
- Dry 1-2 hours.
- Sand lightly with a fine-grade (220-320-grit) foam sanding sponge or 400-grit sandpaper.
- Remove dust with a vacuum, compressed air, an oil-free tack cloth or a water-dampened rag.
- Let dry completely before applying General Finishes product.
Power Prep Cleaning Highly Used Existing Finishes
See our video: How to Power Prep Existing High Use Finishes for Stain or Paint
- Scrub clean with a detergent, such as Spic and Span or Dawn, using a Scotch Brite™ pad.
- Rinse well with water.
- Scrub clean with a Scotch Brite™ pad and a 50:50 mix of denatured alcohol and water. Dry 1-2 hours.
- Sand lightly with a fine-grade (220-320) foam sanding pad.
- Remove dust with a vacuum, compressed air, an oil-free tack cloth or a water-dampened rag.
- Let dry completely before applying General Finishes product.
Alternative Cleaning Solutions for Existing Finishes (Not as aggressive or effective as denatured alcohol; requires rinsing.)
- 50:50 mix of bleach and water
- 50:50 mix of vinegar and water
- Mineral spirits can be used when working with water-based products, but only if the surface is thoroughly rinsed and allowed to dry for 72 hours.
General Finishes Wood Stain 946ml Application Steps
- Watch product overview video here.
- Watch the application video here.
- Work in a well-ventilated area.
- Stir stain to reincorporate solids that have settled to the bottom of the can before and throughout the application process.
- Thin as desired with distilled water; start with 5%, adding up to 10% by volume.
- Increase open time, if needed, with up to 5% General Finishes Extender if allowed by local regulations. GF Extender will improve flow and leveling and increase open time, which is helpful in dry climates.
- An initial coat of General Finishes Pre-Stain Conditioner Natural can improve color uniformity over difficult-to-stain wood species such as pine. However, it will limit color absorption, so a darker stain may be required to get the depth of color you want. NOTES on softwoods such as Pine, Pawlonia, or Poplar, the use of Pre-Stain Conditioner will reduce blotchiness but not remove it entirely.
- Test your complete finishing process beforehand. Stain color can be affected by variances in wood, room lighting, and deepened with the application of topcoat.
- Surface preparation is essential. See “Step 1: Preparation for Water Based Wood Stain.”
- Divide your project into manageable sections: top, side, drawer, door, table seam.
8. Apply product:
Hand-Application over Raw Wood:
- Apply a LIBERAL amount of stain to ensure easy workability using a synthetic bristle brush, foam brush, pad applicator or microfiber roller. Work quickly.
If not enough stain is used, the surface may dry too quickly, causing an uneven appearance.
On large projects, leave a wet edge between sections to prevent lap lines until you can wipe all the excess off.
- Stain one complete section at a time.
- Wipe off the excess evenly with the grain using cloth or an absorbent paper towel. Check for missed spots and lap marks before moving to the next section.
Do NOT use cotton t-shirts to wipe away stain because they will “push” the stain around and not absorb it.
- Pull excess stain out of corners and details with a synthetic bristle brush.
- Immediately correct lap marks by rewetting the entire working area with stain and wiping off the excess.
- Another coat will make the color darker but do not exceed two coats as that will create too much build of a low solids finish. Stains are designed to provide color but are not durable on their own.
- Let the stain dry 2+ hours in ideal conditions when using a WATER-BASED topcoat: 50-70% humidity, 70*F/20*C before adding a second coat (optional) and before adding topcoat. Be sure to allow adequate dry time. If in doubt, wait longer. When using with an OIL-BASED topcoat, allow 24 hours dry time.
Increase dry time if:
- Humidity is over 80%
- More than 2 coats are applied (not recommended)
- Thick coats are applied
- increase to 24 hours if applying an oil-based topcoat over the water-based stain.
- To accelerate dry time in humid conditions, add General Finishes Accelerator before applying and work in a space with good ventilation and air movement. If you decide to re-coat before the recommended time, test dryness.
Spray Application over Raw Wood: with General Finishes Wood Stain 946ml
- Safety: Wear a full filter respirator (NIOSH/MSHA-approved) and work in a ventilated space.
- Spray wet films at 3-5-mil thickness. HVLP: 1.1mm-1.3mm spray tip, medium air cap. Verify tip sizes with your equipment supplier. See our spray tip size recommendations here.
Keep your gun at a 90* angle, 6-8″ from the surface. On large, flat areas, use wet, even patterns 6-8″ wide.
For narrow surfaces, reduce the fan pattern to 2-3″ wide to reduce overspray.
Overlap each pass 25-50% for even coverage.
- Apply section by section. Spray liberally to a complete section and wipe off the excess evenly with the grain using a quality paper towel or shop towel. Check for missed spots and lap marks before moving to the next section. Do NOT use cotton t-shirts to wipe away stain because they will “push” the stain around and not absorb it.
- Spray a LIBERAL amount of stain to ensure easy workability. If not enough stain is used, the surface may dry too quickly, causing an uneven appearance. On large projects, leave a wet edge between sections to prevent lap lines during application.
- Pull excess stain out of corners and details with a bristle brush.
- Immediately correct lap marks by rewetting the entire working area with stain and wiping off the excess.
- Let the stain dry 2+ hours in ideal conditions: 50-70% humidity, 70°F/20°C before adding a second coat (optional) and before adding topcoat. Be sure to allow adequate dry time. If in doubt, wait longer. Increase dry time if:
- Humidity is over 80%
- 3+ coats are applied (not recommended)
- Thick coats are applied
- To accelerate dry time in humid conditions, add General Finishes Accelerator before applying and work in a space with good ventilation and air movement. If you decide to re-coat before the recommended time, test dryness.
Hand-Application over Existing Finish:
See our video: How to Update Existing Finishes with Water Based Wood Stain
- Stir contents well.
- Prepare surface well. See Existing Finish Prep instructions in “Step 1: Preparation for Water Based Wood Stain.”
- Apply stain with a foam brush or staining pad. Feather out uneven areas and pull excess stain from corners using a bristle brush. Discharge accumulated stain from the brush onto a dry paper towel as you work. We recommend using a dry brush technique over an existing finish as outlined in this video: How to Update Existing Finishes with Water Based Wood Stain., but even with this technique, do not apply more than 3 coats. Painting on the stain will create too much film build of a low solids finish. Stains are designed to provide color but if applied too heavily, create an unstable surface even when dry and topocated.
- Let the stain dry 2+ hours before GF water-based topcoat in ideal conditions: 50-70% humidity, 70*F/20*C before applying a second coat (optional) and before applying topcoat. Be sure to allow adequate dry time. If in doubt, wait longer.
Increase dry time if:
- Humidity is over 80%
- More than 3 coats are applied (not recommended)
- Thick coats are applied
- Applying over products from other brands
- Layering General Finishes water- and oil-based products:
- Water over oil: Let oil-based products dry 72+hr before applying water-based products
- Oil over water: Let water-based products dry 24+hr before applying oil-based products
- To accelerate dry time in humid conditions, add General Finishes Accelerator before applying and work in a space with good ventilation and air movement. If you decide to re-coat before the recommended time, test dryness.
- Topcoat is required. Finish with 2-3 coats of General Finishes topcoat. Applying more coats will not improve the results. You can remove any grain raise after applying the first coat of topcoat. Watch this video for more information on grain raise. See “Step 3: Topcoat Over Water-Based Stain.”
Only logged in customers who have purchased this product may leave a review.



Reviews
There are no reviews yet.